9/23/09

My handmade bags

I started to learn sewing since March, 2008. During the first several months, I read many books about fabrics and sewing basic skills. Besides, I liked reading some books in which there were a lot of sewing projects. After one year, I put my finished sewing items on my Etsy shop. At the beginning, I made some stuffed toys, wall organizers, small bags, fabric pins.....Not too bad, I sold all of them with perfect feedbacks, even though it was a little slow to sell them. But the feedbacks from my customers encouraged me a lot. I started to design since May, 2009. Then I registered my new shop on Etsy only for the sewing patterns I designed on Augest, 2009. Now I'd like to write down all the bags I made here and I don't want to forget any one of them. Some of them were gifts for my friends; Some of them were for my shops and future gifts.

This is a cosmetic bag, not so big and just for daily cosmetics, lipstick, eyeshadow, brushes, sunscreen lotion..... There is Sunbonnet Sue applique on the exterior fabric. The applique was hand-sewn stitch by stitch with fabric scraps. Then I embroidered the flowers beside the girl. The little dog is a button. The small bag was fully lined with thick and hard lining and batting. The piping is made by me also. I did quilting on the zipper area to make it stronger. I made this only for practicing sewing skills I just learned, quilting, sewing piping, embroidering, appliquing, sewing zipper with zipper foot, attaching strap or wristlet for a bag...Not all this skills were learned from the books. Sometimes sewing needs creation and invention.


Another two boxy bags. I made them still for practice. I use the red one for my sewing notions and like it very much.
I made this yellow bag for sale. I learned how to use free-motion quilting pressure foot and walking foot from this project. The leaves were embroidered by hand with punch needle. The final effect of the leaves is just like towel. I like them so much. I remember when my customer received it, she wrote to me and said she loved it so much and would be pretty if carry it in the fall.

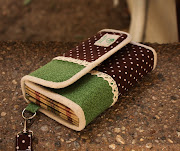
I just listed my handmade bags that were not listed in my shop. All the bags listed in my shop were made after I finished above. I experienced learning, practising, imitating, and designing. During this process I run into many many questions, problems, and difficulties. But I solved them by myself through reading books in the library, looking for answers on Internet, or invent new methods. My husband said he was so pround of me and learned something new so fast.



9/22/09

My hand-stitched crafts

I like sewing by hand. Listening the music, watching my kittens rolling over on the floor, covering the legs with a pretty sofa throw in a cold winter, lying in the cozy recliner, I sew a little bear or a small purse. I feel everything is so peaceful. I imagine deer pass by my window, leaving their footprints on the snow........


Sweet home apron. Totally hand sewn. The appliques, embroiders, bindings......all were made by hands. It's a very big project. I spent two weeks finishing it. This is a gift for my friend, Beverly. Embroidering letters was the most tired and time-consuming job.


The twins were made of felt and not so hard to sew. They are pins. I like pinning them on scarf or pants. 

 
A tiny purse with a green leaf is perfect for coins and gadgets. I spent a whole afternoon to finish only one. It looks simple but a little difficult. I lined them with batting and canvas.


Cute apples. My kitty and I both love them. My husband loves them so much. He doesn't want them to be cats toys. So I put them in my showcase. Very easy project, the important thing is that the fabrics have to match each other very well.

9/21/09

My redwork quilting

I like red color so much. I have red shirt, red scarf, red pants, red necklace, and red bags, even red sheets and quilt on my bed. My favorite photo is that I was in a red shirt with long hair, sitting on a rock in a famous park in China. Red things can always cheer me up. For me, red means happy, lucky.

It's my first time to make a quilt. So I want to make a smaller one for my future's baby, definitely in red color. I think lovely bear is a good topic for a baby. After everything got ready, I cut the white fabric into 8" * 8" square first, and then embroidered the bears by hand. It was not a hard job but a time-consuming one. When the hardest job was finished, other things were so easy to do. The left works are cuting fabrics, sewing them together, placing batting, and binding.


Taking pictures made me sweat a lot. I wanted to place the quilt flat on the ground and take the picture from the top, but the result was not good. Then I hung it on the yard and tried again. Still not very satisfied. But the quilt is not too bad. I liked my first experience of quilting. 

9/18/09

My polymer clay

About two years ago, I run into some amazing artworks made of polymer clay on Internet. Some of them were very cute; Some of them were pretty. I like the bright colors of the clay, moreover I found some artists made very fine artworks. I loved them so much. So I decided to have a try. I am always thinking yard sale is a perfect place to find awesome deals, especially for craft supplies. On a sunny weekend, I bought two boxes of polymer clays at a lady's yard sale, just $2. I remember she was very nice and generous.


This is light pink color clay, just like the skin's color. Besides, I bought some colorful clays at Hobby Lobby. I didn't buy any tools because I didn't know what tools I needed. I wanted to make a doll with my husband's face.

During making the doll, my favorite tools were thin knitting needle, a sharp knife and a needle. The hardest part was how to make a realistic face, and the face looked like his face. I found two pictures of my husband taken in different directions.......


 After a week, I made it, not too bad. It was just a little higher than the can. When I made the head, I started with a piece of aluminum foil kneaded into a head shape. Then I covered a thin layer of clay on the foil. This could save on amount of the clay, and prevent cracking during baking. 

The second hardest part to make is the little hands.


I failed many times until I made satisfactory hands. The fingers were separated with a knife. Then they had to be smoothed by a thin knitting needle. The wrinkles on palms were made with needle tip.

Other parts were easier to make, such as hair and shoes......


The body inside the clothes was not made of clay. I used the wire to make a shape of the body, and then covered a layer of cotton to imitate muscles. Last, put on the clothes for the doll.

I knew some sewing skills, so it was easy for me to measure the doll and make a jacket and pants for him. 


9/14/09

My paper quilling

I knew what paper quilling was about 3 years ago. On a sunny weekend. I found a box of colorful paper strips in an old lady's garage sale. I was so curious about them and asked her. She was so nice to tell me what paper quilling was and gave me the whole box paper strips just for 2 dollars. Since then, I started to work with those beautiful strips everyday.

I went to the libraries, book stores and websites to learn everything about paper quilling. I fell in love with it very quickly. I learned basic skills, researched a lot of artworks of paper quilling. I imitated them and created my own works. Sharing them with my friends is my happiest thing. So I made payper quilling cards for my friends. I made thank-you cards, happy-new-year cards, happy-Christmas cards, farewell cards............

I made this card for my Japanese friend, Megumi. She and her husband were going to New York.
 

I made this card for Barbara. She sent me some gifts, and I sent her this thank-you card.
(The little pink flowers was made by my scrapbook punch, and I love them so much..... After several days, I received the email from her. She said the card was so pretty.)

I made this card for my best friend: Beverly. She was my teacher. After she got the card, she put it on her fireplace during Christmas.

I made this card for my friend: Heather. She is an art teacher. We had a lot to talk when we get together. I sent this card to her when my husband an I visited her house on Christmas Eve. 
 
  
I made this card for my family's friends, Connie. She gave us a lot of help and we appreciate her helps from the bottom of the hearts.

My husband loves colorful wild butterflies. He always says he is so proud of me and gives me great support whatever my hobby is. I made this for him. 

Blog Widget by LinkWithin
 
©  free template by Blogspot tutorial